The beekeeper can make a hive with his own hands, using wood, plywood and even polystyrene for this. The development of the chrysalis and the productivity of adults will depend on the conditions created in the bee house, therefore, it is necessary to approach its design and production with all responsibility.

Typical hive structure and components
To independently make a house for bees, you first need to figure out its basic structure. Any model should have the following components:
- Housing. It is located in the lower part of the structure and implies the presence of special grooves on which the frames are installed. Depending on the size and type of hive, their number varies from 9 to 16. As a rule, such joints are installed parallel to each other. The walls of the case are made with a heater, which is most often ordered as a heat insulation paper plate impregnated with bitumen. Its main substitutes are linen mats, expanded polystyrene.
- Bottom. At the same time performs two functions - the foundation of the structure and the "runway" for bees. The bottom can be nailed or removable. From the point of view of operation, the second option is optimal because it simplifies cleaning the nest. Between the bottom and the frames you need to form a subframe space with a length of at least 20-25 mm. It is necessary for cleaning the hive before spring flying around the bees. Some beekeepers leave a space of 40-60 mm, and a container with feeding for insects is placed under the frames.
The frame-air space forms a steam-air valve, without which the activity of the swarm state of the bee colony will decrease, since the flying bees will not land on the brood honeycomb.
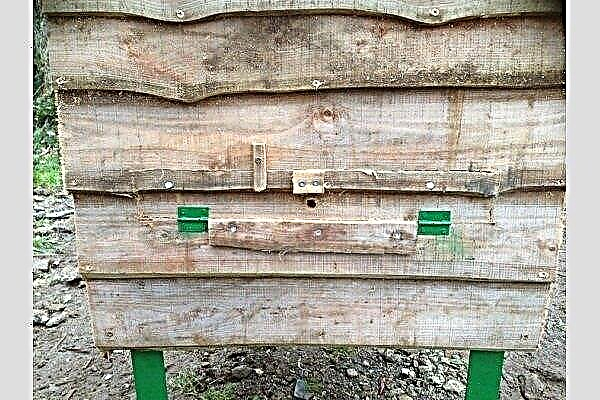
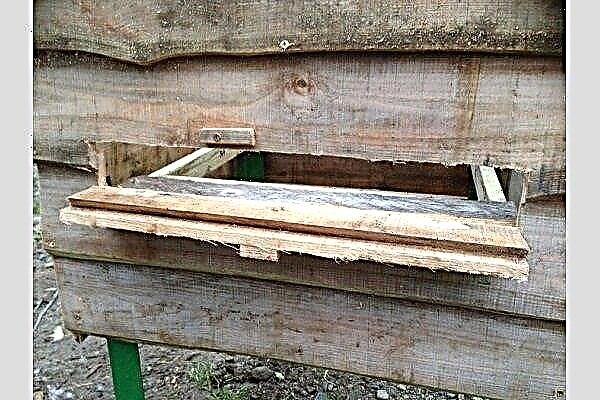
- Letok. This is a hole that allows bees to freely fly out and return to the hive. It is cut in the front of the case, often at the bottom, since the top hole takes about a third of the heat. It is closed by a hinged latch, which is attached to the front wall of the housing using rotating loops. Some models have two tap holes - the upper and the lower. The first of them opens in spring and summer, and closes in winter. The lower entrance opens for the winter season to provide access to fresh air.
In the case of a removable bottom, the tap hole is often made just above the central part in the form of a semicircle with a diameter of 30 mm. If the bottom is nailed, then the diameter of the slotted notch should be at least 100 mm, and the length should be about 10 mm.
- Shop (store extension). The hive section, which is located above the hull. In this compartment, the bees stack honey during the bribe period, which greatly simplifies the task for the beekeeper to collect it. Usually a store is made with the same linear parameters as the case, so it contains the same number of frames for honeycombs. Sometimes the extension is used to place the layering in the winter season, so it is insulated with the body or made with double walls. Some models do not have a store.
Experts advise using the store with small bee colonies that do not produce a large amount of sweet product.
- Awning. The upper part of the house, covering the store or nesting building, to protect the shoulders from rainfall and at the same time create air space like an attic, which helps maintain the optimal temperature regime in the hive. A hole is made in the ceiling for ventilation and free movement of bees. If the roof liner replaces the roof, it is made of plywood or board and sheathed with a thin sheet of steel to protect the wooden parts of the hive from moisture.
Such structures are often equipped with the following components:
- Framework. Depending on the shape of the hive, they can be square, low wide or narrow high, but in any case they have the same protruding edges - folds, which are supported by slats fixed on the walls of the store or the case. The thickness of natural wood frames is often 10-40 mm. To help the bees in creating honeycombs, sometimes a stainless wire or thick fishing line is pulled on them. 6 mm must be left between the frames and the walls of the hull so that an inter-frame fishing rod is formed through which the bees will fly after the construction of the honeycombs.
- Delimiters. Provide the necessary distance between the frames. The cracks in them are made so that the working bees can fly up. Permanent delimiters can be point or linear. The former fasten adjacent frames at the desired distance at only one point, and the latter along the entire lower bar. There are also profile side dividers in the form of an extension of the side rails in the upper part, which prevents the contact of honeycombs created by bees inside the frame. It is also called a shoulder and usually has a length of about 100 mm.
- Aperture (insertion board). This is a plank or wood board, the width and height of which correspond to the internal dimensions of the case. It is located inside the hive and divides it into two parts. It is often used in case of keeping two bee families in one house.
- Ruberoid subframe. A sheet of roofing material, the length and width of which corresponds to the size of the bottom of the body. It is inserted into the hive through the summer when replenishing the hive with food for the winter. During the winter season, wax crumbs and deaths accumulate on it, so in early spring it must be removed and stored until the end of the season.
- Dividing grid. It is installed between the case and the store so that the uterus does not pass from one part of the hive to another. The grill is made of wire or plastic and has cells of at least 4.2 mm in size. Thus, working bees freely pass through them, but those with larger sizes of the uterus and drones remain in the main nesting section.
- Ventilation frame. Lightweight construction made of wooden battens with a metal mesh stretched over them, the cells of which are 3x3 mm in size. It is placed in the upper part of the hive instead of the ceiling panel, but sometimes the ventilation window is also made in the roof itself.
- Hinged panels. Used to connect the case and store extension. Hinges are attached at the corners on the front wall of the hive, between the case and the store. With their help, you can tilt or completely remove the magazine to free up the internal space of the socket housing. Some models use retractable staples instead of hinges.
- Connecting tape. Ensures a reliable connection between the body, the magazine and the roof. For this, it is installed along the docking lines. As a rule, a strip of steel strip is used, the width of which is 25 mm and the thickness is 2 mm.
The following diagram shows the basic structure of the hive, where 1 is the base, 2 is the bottom, 3 is the body, 4 is the divider, 5 is the store with frames, 6 is the ceiling, 7 is the cover:

The main types of beehives with drawings
With your own hands you can make a hive of different shapes and sizes. The most popular options among beekeepers will be considered separately.
Hive Dadan
It is found in almost all apiaries. It is made of wood - cedar, spruce, pine, linden or aspen. As follows:

Its obvious advantage is simplicity, spaciousness and modularity. The classic model consists of 12 frames, but as the bee colony grows, it can be supplemented with new buildings or shops. Here is a drawing of the classic 12-frame Dadan hive:

The lid can be made not flat, but 1- or 2-pitched, so that raindrops better slide off the roof surface.
Alpine hive
According to the principle of construction, the design resembles a hollow, since during its development the beekeeper Roger Delaunay tried to recreate conditions for bees that are as close as possible to natural conditions.

Externally, the alpine hive is a multi-hull vertical "pyramid", since the nesting bodies in it are located one above the other. Because of this, the design is compact, but has a high height, and also involves such features:
- in cases there are no partitions, ventilation gaps and grilles;
- in the lower part of the house there is a notch, through which the natural circulation of air is carried out and moisture accumulation is prevented, as well as condensation;
- in the upper part of the hive, a feeder or ceiling is made to create an air cushion;
- all cases, except the bottom, do not have a bottom, therefore, combs or slats are fixed to install frames on the walls;
- each compartment of the general building accommodates from 3 to 8 frames, depending on the number of individuals in the bee family.
There is no need to warm the walls of the hive, since in winter it is simply covered with a plastic bag.
Langstroth Ruth Hive
The design of the vertical type is done in several floors of 10 frames and takes up a minimum of space. Experienced beekeepers create beehives of this type up to 7-8 floors and with their help they collect more than 200 kg of honey in combs per season. Beginners can use the option in the minimum version - with one case and a floor magazine, since a large magazine nozzle will significantly increase the total volume of the structure and make it difficult to warm the nest.
Here is a diagram of a multihull hive:

If individual blocks of the structure are equipped with pins, a more reliable structure can be obtained.
Cassette hive
Unlike other models in this hive, the nesting cases are made in the form of drawers, which are installed in a common case with bars fixed on its sides - runners, on which the cartridges will go. The distance between the frames in the case must be at least 10 mm, in order to isolate part of the hive from the main space if necessary with horizontal grilles or plywood partitions.
On each retractable hull of such a hive, slots are made, the central of which have a diameter of 25-30 mm, and slotted ones are 200 mm long and 10 mm high. If you plan to make a common door, then openings for the doors should be made in it, opposite to the gaps between the cassettes. Under each letka an access rail is attached. The whole structure is protected by a shed roof, under which ventilation holes are provided.
A multi-case cassette hive with 10 frames can be assembled according to the following scheme, where 1 is a single case, 2 is a cassette, 3 is a frame, 4 is a separation panel, 5 is a layer of insulation, 6 are protective covers, 7 are cassette sections:

A cassette hive requires more effort and materials to make, but it is more convenient to transport than others, therefore it is the best option for visiting apiaries.
Hive sunbed
Unlike the above models, such a hive is horizontal and is great for placing several bee families. A similar design is a box divided by stationary partitions into several parts, in each of which a separate family of bees with their uterus settles.
The hive can be additionally equipped with a magazine by installing it on top of the nesting compartments or between them. For each of the departments in the lower part of the front wall, a notch is prepared. It is better to make the gable roof to protect the structure from precipitation and overheating in extreme heat.
Sunbed can be made for one bee colony. Here is a drawing of such a primitive design:

Material selection
In the manufacture of the hive, you can use various materials:
- Wood. The classic option for building a bee house. Helps create natural conditions for insects. It is best to choose a pedigree tree - cedar, although you can use linden or aspen, but the structure will have to be additionally insulated. These hives are dry, breathe well and smell good. The use of pine, spruce and fir should be discarded - in such houses it is warm, but moisture and resin accumulate in them, and there is also a coniferous aroma.
To make a beehive, you need to choose wooden boards, the moisture content of which is kept within 15-16%.
- Plywood. It refers to durable and environmental materials, but the structure of it must be covered with paint, and insulated with polystyrene foam from the inside to preserve heat and dryness. Plywood is extremely sensitive to moisture, so it needs constant and proper care.
- Expanded polystyrene. A relatively new material in the manufacture of beehives. Attracts by low cost and lack of need for additional warming in the winter. Expanded polystyrene has its drawbacks - it is fragile and brittle. When using material of poor quality, there is a possibility of deterioration of the properties of honey.
- Styrofoam. One of the most economical and affordable options, since you can even use packaging from household appliances. The foam construction is lightweight even with filled frames and excellent thermal insulation, however it is very fragile and needs constant painting to protect it from sunlight.
- Polyurethane. It has good thermal insulation and does not allow moisture to pass through, so fungi and bacteria do not develop inside the hive. This material is practically not gnawed by bees, mice and birds, however, it has its drawbacks - it is highly combustible and practically does not allow air to pass through.
A beehive from any material should be painted white, as it is better remembered by insects and repels sunlight.
How to make a wooden beehive?
This design is often of two types - vertical and horizontal. We will consider the assembly of each model separately.
Beehive lounger on 16, 20 and 24 frames
The manufacturing principle of the sunbed is the same, regardless of its spaciousness, but before you begin construction work, you need to correctly calculate its dimensions:
- On 16 frames. The thickness of the inner case is 2-2.5 cm. The height of its front and rear walls is 60.5 cm and the length is 32 cm. The same parameters for the side walls are 53 and 32 cm, respectively. The thickness of the outer walls is 1.5 cm. The height of the front and rear walls is 67.5 cm and the length is 50 cm. The same parameters for the side outer walls are 56 and 50 cm.
- 20 frames. The thickness of the structure remains unchanged, but the dimensions of the walls are adjusted. The height and length of the front wall are 87 and 37 cm. The same parameters for the back wall are 87 and 44 cm, and for the sidewalls 49 and 44 cm. The bottom parameters are: height - 84 cm, width - 54.5 cm, thickness - 3.5 cm
- 24 frames. The body is made 84 cm long, 56.6 cm wide and 63.5 cm high. Its bottom should be 3.5 cm thick. Outside, the roof is 93.5 cm long and 81 cm inside.
In order for the beehive to turn out smooth and without large gaps, its size must be strictly observed.
In the manufacture of the hive, you will need such materials and tools:
- well-dried wooden boards, plywood, polystyrene;
- machine for processing boards;
- a hacksaw or other tool for cutting workpieces;
- a hammer;
- drill, drill, screws;
- chisels;
- casein glue;
- square;
- pencil.
The assembly instructions for the sunbed of any size are as follows:
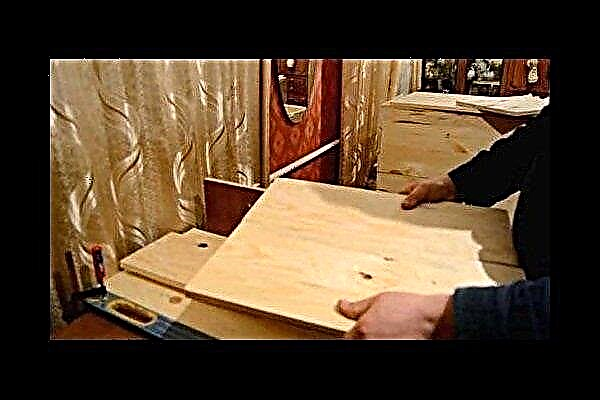
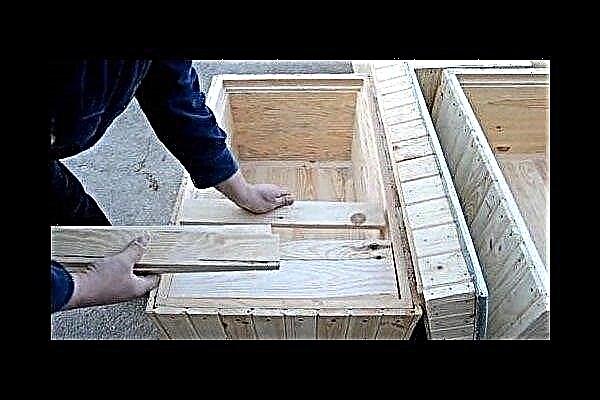
- Cut the board to the desired size, and remove all burrs with a plane. Use sandpaper to sand its surface so that it is smooth and free of defects.
- Connect the blanks for the sidewalls with joiner glue. To do this, grease the ends with it and press the parts on a flat surface. To fix, on one side of the table, install a vertical rib, and on the other, use clamps to fix the construction level in the right place. On top you can put another workpiece for additional pressure and eliminate bumps.
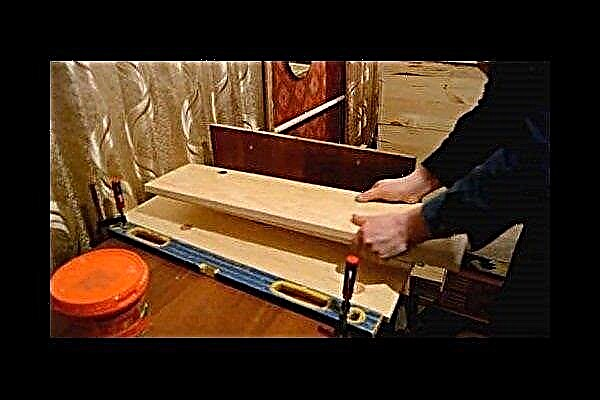
- In the same way, glue the end walls and the bottom of the box. Remove any irregularities on the surfaces using a grinder.
- Check the conformity of sizes and eliminate minor defects, and then collect the box, parts of which are secured with glue and screws. Level check the accuracy of the corners.
- From wooden planks (10x10 mm) make supports for the frames, fixing them with glue and nails.After check the conformity of the dimensions of the parts.
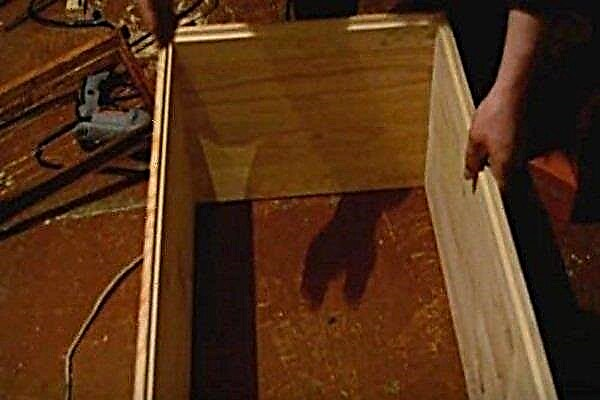
- For each face of the box, create a frame using 40x20 mm rails.

- Cut holes in the side wall with an electric jigsaw - two in the lower part and one in the center. During operation, open them as the bee colonies grow. On the front and rear walls, make grooves for the frames measuring 1.8 x 1.1 cm.
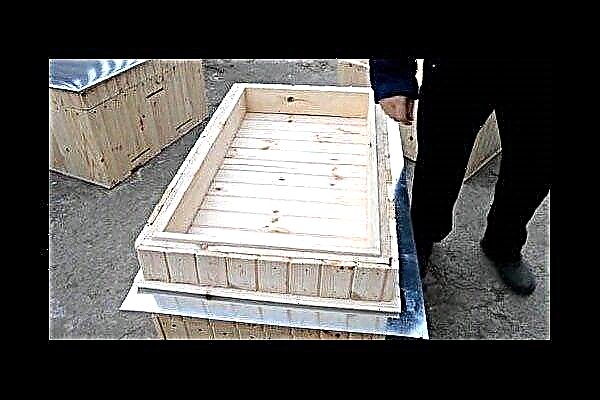
- Attach the bottom. It can be assembled from two battens and flooring using soil and nails. In this case, it is worth making a protrusion for the bars of 2 cm.
- Install polystyrene foam - leaves with a thickness of 20 mm and a density of 25 kg per m3. Mount the lining on top. The resulting design will be multi-layer and with good insulating characteristics.

- Make a roof. To do this, cut boards 100 mm long and make a box out of them. At the bottom, install the rail and check the matching sizes. With lining boards, create a roof surface, cut out ventilation openings in it and cover them with galvanized sheet to protect it from atmospheric influences.
- Lay out the ceiling in planks.
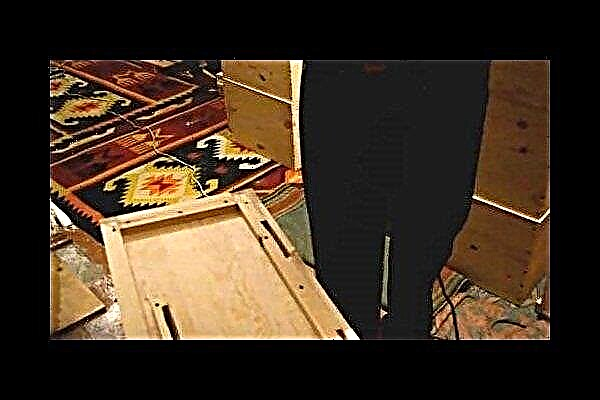
- At the finishing stage, mount the arrival plate, paint the box and install a special latch to secure the lid during transportation.
- To fix the upper part in the raised position, use flexible tape.


Handles for transfer can be attached to the manufactured box.
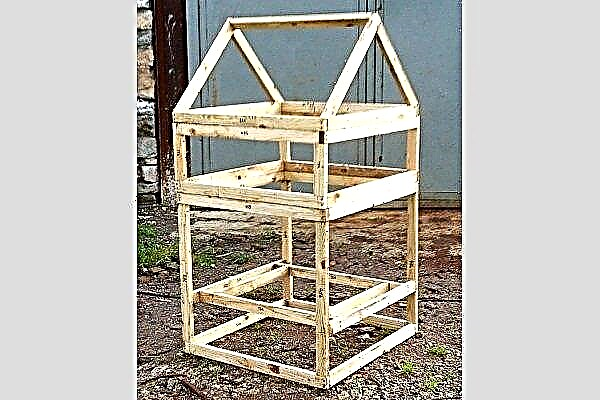
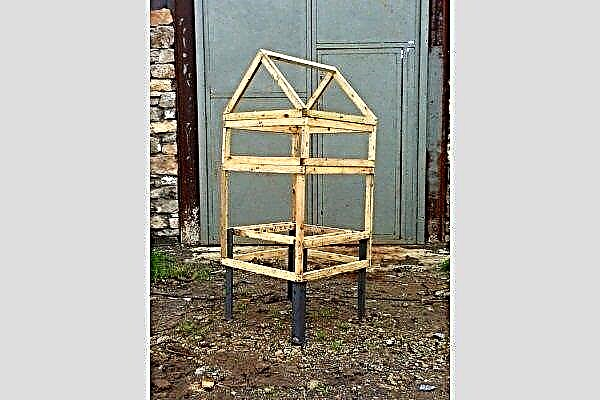
Gable vertical hive
The optimal dimensions of such a house are 130x60x60 cm, and the height is measured from the ridge of the roof. Here is his drawing:

A similar design is made up of such parts made of wood and metal:
- vertical racks of the case (1) 48.6 x 3.2 x 1.8 cm - 4 pcs.;
- vertical racks of the store (2) 15.4 x 3.2 x 1.8 cm - 4 pcs.;
- longitudinal bars of the bottom of the nesting compartment (3) 42.4x3.2x1.8 cm - 2 pcs.;
- transverse bars for the nesting compartment, the store, the bottom and the roof liner (4) 60x3.2x1.8 cm - 10 pcs.;
- longitudinal bars for a nesting compartment, a store, a bottom and an aisle (5) 56.4x3.2x1.8 cm - 12 pcs.;
- transverse bars for the bottom of the nesting case (6) 56.4x3.2x1.8 cm - 2 pcs.;
- roof ridge beam (7) 56.4x3.2x1.8 cm - 1 pc.;
- roof rafters (8) 39.2x3.2x1.8 cm - 2 pcs.;
- roof rafters (9) 42.4x3.2x1.8 cm - 2 pcs.;
- steps (10) 8x8x0.3 cm - 4 pcs.;
- retaining legs in the form of a steel corner (11) 50x5x5x0.3 cm - 4 pcs.;
- covering a ridge beam in the form of an aluminum corner (12) 68x5x5x0.3 cm - 1 pc.;
- facing board (13) with a thickness of 6-8 mm - 1 pc.;
- arrival board (14) 46x7x0.6 cm - 1 pc.;
- plywood panel with ventilation holes (15) 46x46x1.2 cm - 1 pc.
To make the designated structural elements, as well as to insulate it, you need to prepare the following materials:
- plywood 10-12 mm thick;
- a bar with a section of 32x18 mm - 20 linear meters;
- unedged board or wooden lining 6-8 mm thick;
- 5 cm long nails;
- screws 2.5 cm long;
- steel corner 200 cm long;
- aluminum corner (5x5x0.3 cm) 70 cm long;
- steel plates (8x8x0.3 cm) - 4 pcs.;
- steel sheet 1-1.5 mm thick and 60x100 cm in size for roofing (instead of it you can use the same board as for wall cladding);
- folding hinges - 4 pcs.;
- window hinges (5x3 cm) - 2 pcs.;
- linen insulation;
- linseed oil for wood impregnation;
- paint on wood.
Of the tools you will need:
- welding machine;
- electric drill with a set of drills;
- screwdriver;
- electric jigsaw or hacksaw for wood;
- grinder for metal cutting;
- tape measure, square, pencil;
- a hammer;
- paint brush.
Having prepared everything you need, you can begin to make a beehive, following this instruction:
- Prepare the frame details. To do this, plan the timber, soak it with linseed oil, mark and cut into workpieces using an electric jigsaw or an ordinary wood hacksaw. So that when hammering nails, the beam does not crack, hammer them at an angle. You can previously drill a hole in it at an angle of 30 °, the diameter of which is 1-1.5 mm smaller than the thickness of the nail leg.
- Make the lower frame of the frame, after laying the timber over the building corner so that the corners do not skew. Fasten each side with two nails or self-tapping screws, driving them through a longer bar into the end of the short one. Similarly, assemble the upper frame of the housing. Next, connect 2 frames with vertical angular bars.
- Measure 18.2 cm from the bottom frame and at this level, nail horizontal bars between the vertical posts on the front and rear sides of the frame so that their upper edge coincides with the top of the steel corner of the legs.
- Measure 5.2 cm from the edges of the fixed beam and nail bars No. 6 perpendicularly along the walls. Between them and the uprights there will be a space in which the leg corners should fit freely. They will serve as a stand for the ventilation grill and the internal corridor going from the tap. Measure 5.5 cm from the edges of these bars and fix short bars No. 3 perpendicularly to them.
- Assemble the magazine extension by first making the lower and upper frames, and then fastening them together with vertical stalls.
- Fasten the roof elements. To do this, initially assemble the lower frame, and then fix the rafter elements installed at an angle on it and connect them together with a ridge beam. At this stage, the assembled structure looks like this:
- Prepare the legs of the hive. To do this, mark the steel corner and cut it into pieces 50 cm long. 2 cm from the top edge of the corner mark 2 holes, and 18 cm - 2 more. Their diameter is 5 mm. Next, take steel plates and weld them to the legs from the side opposite from the drilled holes.
Some beekeepers use wood to make hive legs, however, in this case, the material must first be carefully treated with a protective solution, since in the future the stand will need to be deepened into the ground for guaranteed stability of the house.
- Press the finished legs to the bottom of the vertical uprights of the frame, and then screw them with screws through the prepared holes. The optimal distance from the footboard to the lower beam of the frame frame is 30 cm.
- On the inner side of the beam of the upper frame of the store and the socket housing, fix the protruding stops on which the frames will be mounted. Fix slats with a width of 8-9 mm along the entire length of the side bars of the frame. From one of the sides of the hive to the hinge frame and the upper frame of the store, as well as on the lower frame of the store and the upper nest housing hinged hinges. In the future, this will help to easily extract frames with honeycombs from the hive.
- Sheathe the front side of the nest housing with facing material - wooden boards pre-treated with linseed oil. Mount them at an angle to the frame beam so that each top board rests on the bottom.
- In the fixed covering of the lower part of the hive, cut a notch in the form of a rectangular hole measuring 46x7 cm. Save the cut out part of the board in order to use it for arranging the hinged door.

- Under the cut-out window, fix a small board as a stand under the fly-through hinged door. At the opening, it will turn into an arrival platform.
- Fix the cut-off part of the casing to the hinges, which should be installed under it so that it opens outwards. To fix the door in the closed position above the cut-out hole, use a self-tapping screw to fix a plate or metal strip, which should turn over freely and become the simplest latch.
- Fix the corridor board from the inside of the groove hole to the frame beam. Next, insulate the floors. To do this, turn the nesting case, place linen mats on the boards below and cover them with waterproofing material. Sheathe the bottom from the outside with plywood. The remaining sections of the hive are sheathed with plywood from the inside, and then on their outside install linen mats in the frame of the frame. Cover the insulation with a windproof waterproofing film.
- Cover the roof with the same board as on the walls, or with galvanized steel sheet. In the second case, it is necessary to add 2-3 rafters to the structure slopes, and then sheathe the roof with plywood and only after that lay a metal coating.
The second option is optimal, since it eliminates the risk of blood flow. If boards are used, then their fastening should begin from the eaves of the roof and lead sequentially to the ridge. Mount each subsequent board with an overlap on the previous one. At the end, fasten the aluminum corner to the roof ridge. - Install a plywood panel with ventilation holes in the roof space. When operating the hive between the store and the case, install a separation grill, and on the panel and bottom - a feeder with syrup.


The outer lining of the hive can be performed both before installation in a permanent place, and after digging the supports into the ground.

How to make a polystyrene beehive?
A typical object made of polystyrene foam is a case measuring 44x25 cm, which has a cover, bottom and feeder. Wooden frames weighing about 10-12 kg are mounted inside it.
For the manufacture of the structure, such materials and tools will be required:
- expanded polystyrene sheet;
- wood screws 5-7 cm long;
- fine sandpaper;
- liquid Nails;
- aluminum mesh with mesh sizes up to 3.5 mm;
- water-based coloring mixture;
- steel corner;
- circular saw or clerical knife with a reliable hard blade to ensure evenness of the parts to be cut out;
- screwdriver;
- metal ruler not less than 100 cm long.
To make a bee hive, you must follow this plan:
- Mark out a sheet of expanded polystyrene using a conventional felt-tip pen and a metal ruler, and then cut out all the fragments for future construction. Sand the edges for evenness with sandpaper.
- To do a clerical knife or saw along each wall of the “quarter”, the value of which is equal to half the thickness of the expanded polystyrene sheet. They are necessary for connecting fragments of a structure.

- Attach both sides of the case so that the protrusions enter the grooves, and then apply liquid nails to the joints.
- As soon as the glue dries and the joints are fixed, tighten the structure from the outside with screws in increments of 10-12 cm. Each of them needs to be deepened by 5 mm in the thickness of the sheet.

- Assemble the finished cases of each segment in one design, fitting the upper part to the lower one. Make sure that during assembly there are no gaps or gaps, as they will adversely affect the thermal insulation of the house.


A beehive can be insulated with tiles whose thickness corresponds to the size of the finished product, but varies within 2 cm, 3 cm or 5 cm.
Polyurethane Beehive Instructions
Creating a beehive from such material is a rather time-consuming process, so it is advisable to divide it into several stages, each of which we will consider later.
Body assembly
To do this, you need 8 metal plates - 4 for each of the external and internal contours. Spacers must be installed between the opposite sides, and the external tiles bolted. To form grooves in the housing for gripping, screw metal plates to the inner sides of the external tiles.
The base and the closing lid should be made with the grooves into which the plates will be inserted. Align metal strips at the edges and bolt them together. Drill holes along the inside and outside the perimeter of the housing to insert threaded metal rods into them during assembly. Screw the bolts on them, holding the entire structure. In the cover, make a hole for pouring the mixture and mount the valve with a plug to close it.
Installation of the bottom and roof
The roof should be made of two rectangular parts, one of which should have protruding sides along the edges, and the other a protruding rectangular interior.
The bottom is a rectangular frame with a metal mesh in the center. It is best to assemble it from individual polyurethane foam bars, bolting them together.
Separately, you need to make molds for the bars - side, back and front. Lay out a strip of metal along the inner perimeter of all the bars to form a fold. Lay on them and nail a metal mesh with a stapler. The front bar is best positioned lower in order to obtain a pit gap.
After casting in the inner sidewalls, select a milling groove for the bottom valve. Cut it out of polycarbonate. The back bar should also be positioned lower in height to insert a valve into the resulting slit and guide it into the grooves of the side walls.
Preparation of a mixture of polyurethane foam
This material is obtained by the reaction of a polyol and a polyisocyanate. When pouring the mixture, it is necessary to correctly calculate the total mass, adhering to this order:
- Calculate the volume of the hive part and multiply it by its width, thickness and length.
- Multiply the obtained value by the technological loss coefficient (1.15) and the estimated density of polyurethane foam (60 kg / sq. M).
As a rule, about 1.5 kg of polyol and 1.7 kg of polyisocyanate are consumed for one hive case with a thickness of 5 cm. The mixture must be poured very quickly - in 10 seconds, because it quickly hardens. For mixing and pouring, use special devices or a regular construction mixer. In the second case, it is necessary to pour polyisocyanate into a flexible container and immediately mix it with a mixer, then pour the polyol and mix for 3 seconds. After that, pour the finished composition into the mold.
Extraction and staining of the hive
Within 30 minutes, the mixture solidifies. After that, the bolts holding the rods must be untwisted. Knock down the top of the mold with a wooden block and a hammer. Next, unscrew the bolts on the ribs of the form, but act carefully so as not to deform the structure. So walk two circles on all the bolts and remove the spacers. Remove excess polyurethane foam along the edges of the case with a sharp knife.
At the end, sheathe the structure with fine-grained sandpaper, and paint the facade with acrylic paint to protect the hive from ultraviolet rays. Paint the house within a week after manufacturing, but not earlier than 8 hours.
You can make a bee hive yourself, using various drawings and materials for this. In addition, you first need to choose one of the options for such a design, taking into account the region of residence and the size of the apiary. In any case, the finished hive must be completely airtight and have good thermal insulation properties.